Simple Glade3 GUI
Getting Started
Requirements
To start with I’m using Ubuntu 10.04 and yes it is a little dated but I use it because I’m involved with LinuxCNC software and that is the latest version supported by the real time kernel.
Installing Glade3
If your using the Debian Wheezy LinuxCNC you will need to install Glade 3.8.0 for GTK2. The installed version of Glade is 3.12.1 for GTK3 and this will not have any of the LinuxCNC widgets. In a terminal type
From the Ubuntu 10.04 menu Applications > Ubuntu Software Center type in glade in the search bar to bring up the GTK+2 User Interface Builder. Click on more info and at the bottom you will see what version of Glade it is. Install if version is 3.x and it will be on the Applications > Programming menu.
I have Glade 3.6.7 installed and Python 2.6.5 so these versions or anything newer should work. You can check your Python version by opening up a terminal and typing in python --version. When you run Glade just look in Help > About
First Glade Project
-
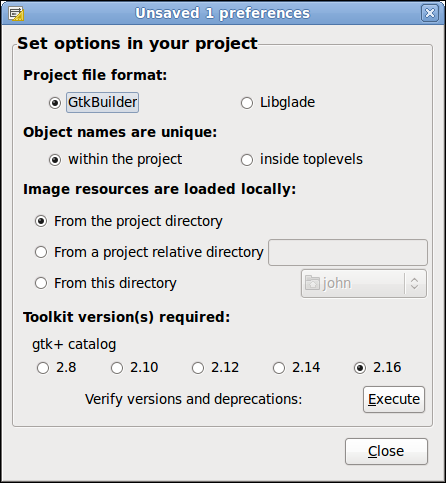
Run Glade3 and the first screen you will see is the Project Preferences. We are using GtkBuilder and not the outdated Libglad so you can just accept the defaults in the preferences screen and close it.
-
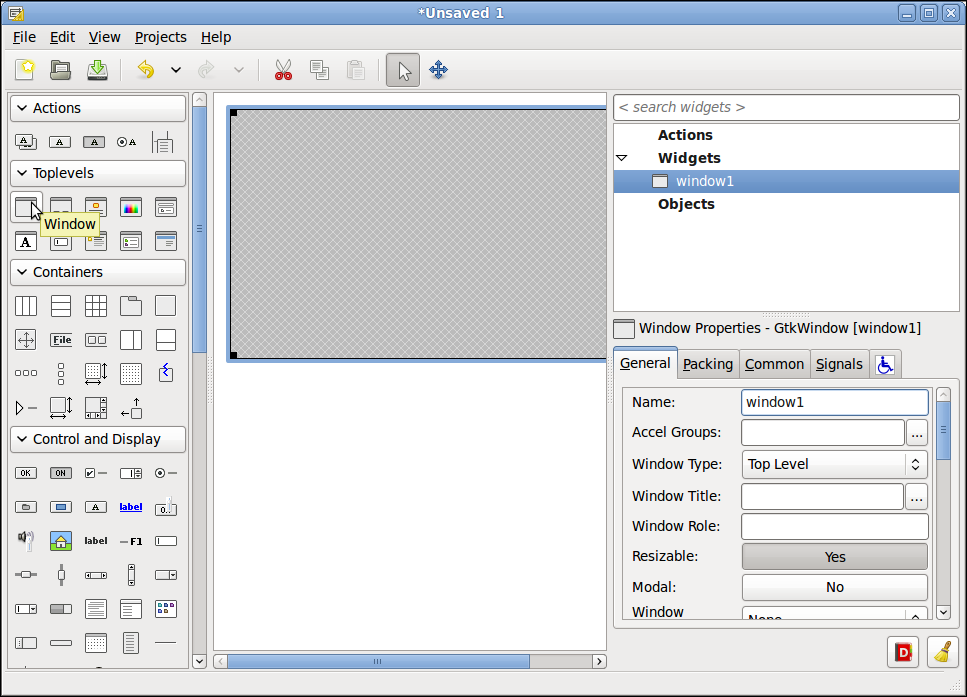
Now you have an empty project. Press F1 to bring up the help menu then select Getting Started. Notice what each section of the Glade3 Interface is called.
First thing we need is a window so from the Palette > Toplevels click on the window and that will add a top level window to your project.
Your project should look like this now.
-
From the Palette > Containers click on the vertical box, then click in the window and leave the number at three in the pop up.
Your project should look like this now.

-
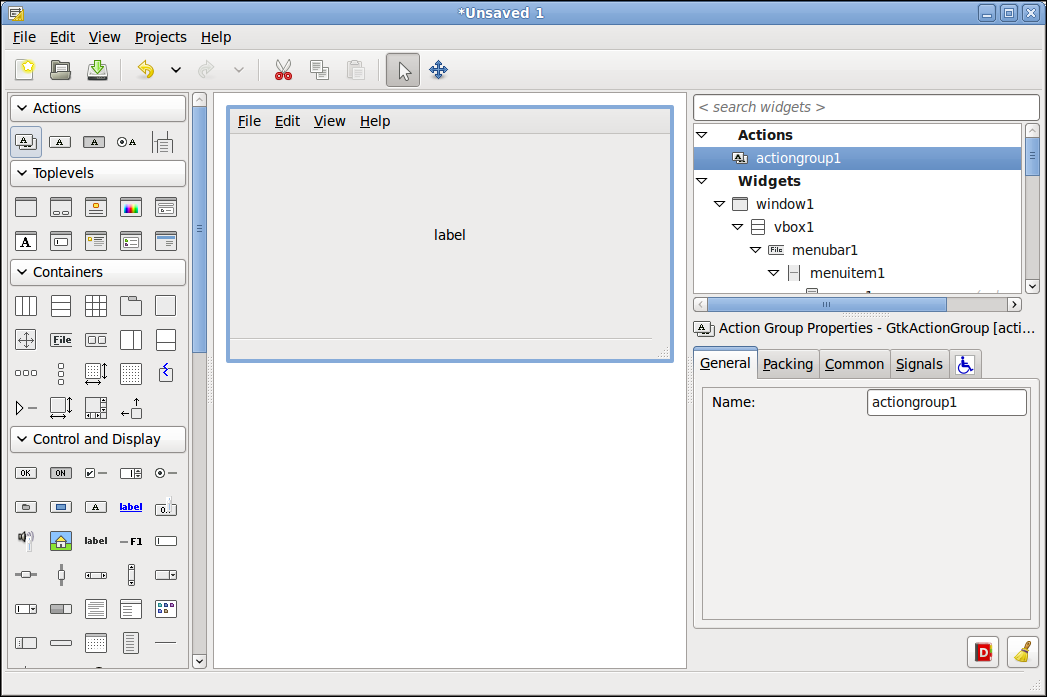
Now we will add a Menu Bar to the top section of the vertical box from the Containers, a label to the middle of the vertical box from the Control and Display section of the Palette and a status bar to the bottom section of the vertical box from the Control and Display section. And just accept the default of 3 items as I don’t think that really does anything.
Your project should look like this now.
-
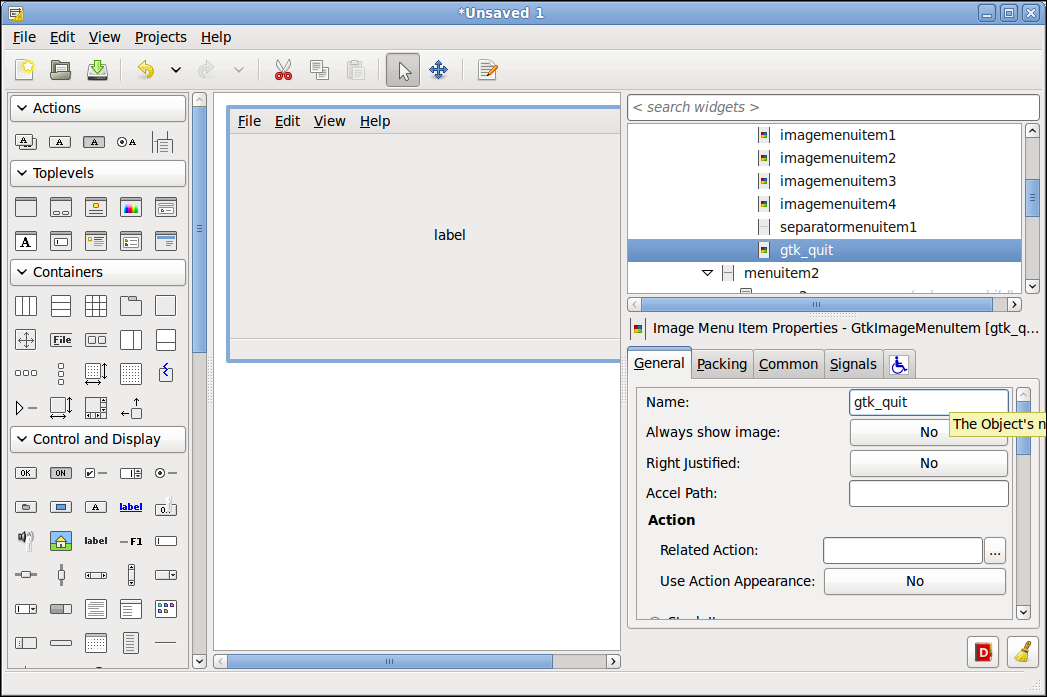
Now we need to create a signal from the Quit on the menu. The default name for Quit is imagemenuitem5 which is a bit cryptic so we will change that to gtk_quit. In the Inspector click on imagemenuitem5 then in the General tab of the Properties dialog change the Name: to gtk_quit.
Your project should look like this now.
-
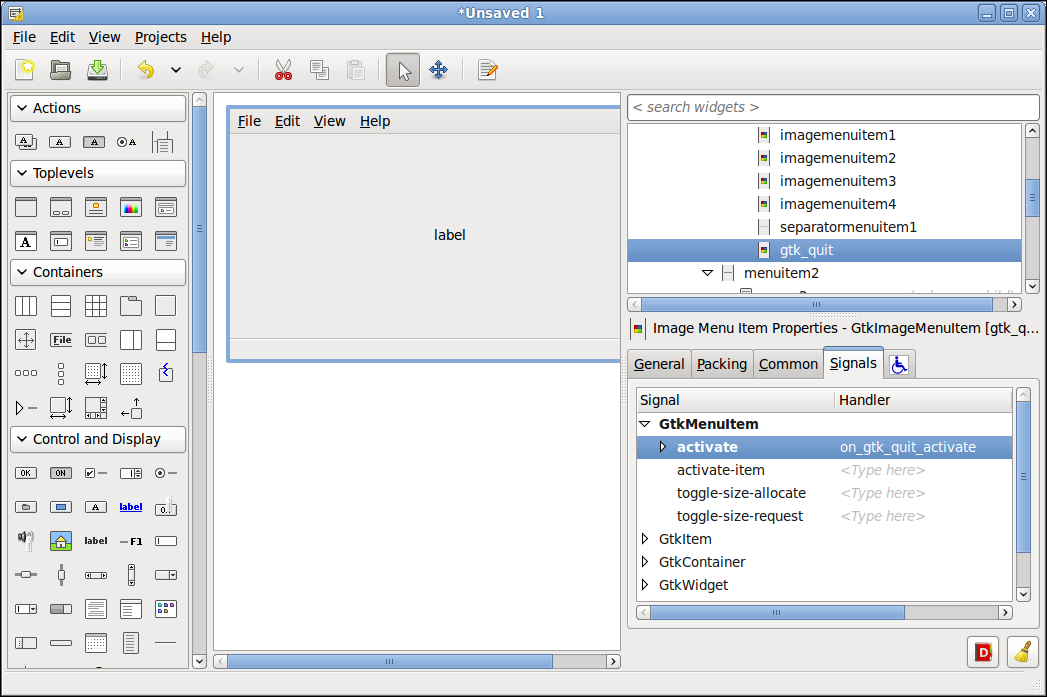
Now in the Signals tab of the Properties dialog under GtkMenuItem in the Handler column click on the <Type here> next to the activate Signal. From the drop down box select on_gtk_quit_activate then press Enter. If you don’t press the Enter key the selection will not be saved!
Your project should look like this now.
-
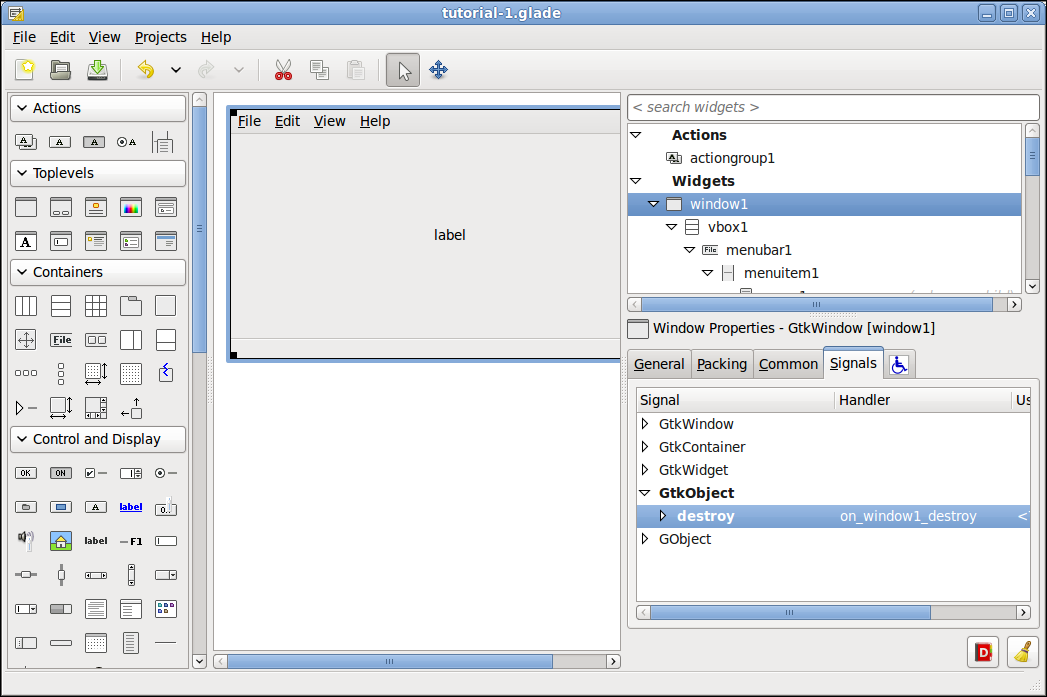
Next we need to create a signal from the main window if someone clicks on the X in the corner to close the window. Click on window1 in the Inspector then the Signals tab and then GtkObject and for the destroy signal handler select on_window1_destroy. Again don’t forget to press the Enter key after making the selection.
Your project should look like this now.
Ok, that’s it for the Glade3 part of this tutorial. Save your Glade file as tutorial-1.glade to an empty directory and don’t forget to type in the .glade extension as it is not automagiclly added. You can close the Glade designer now.