Notebook
Creating the Glade
-
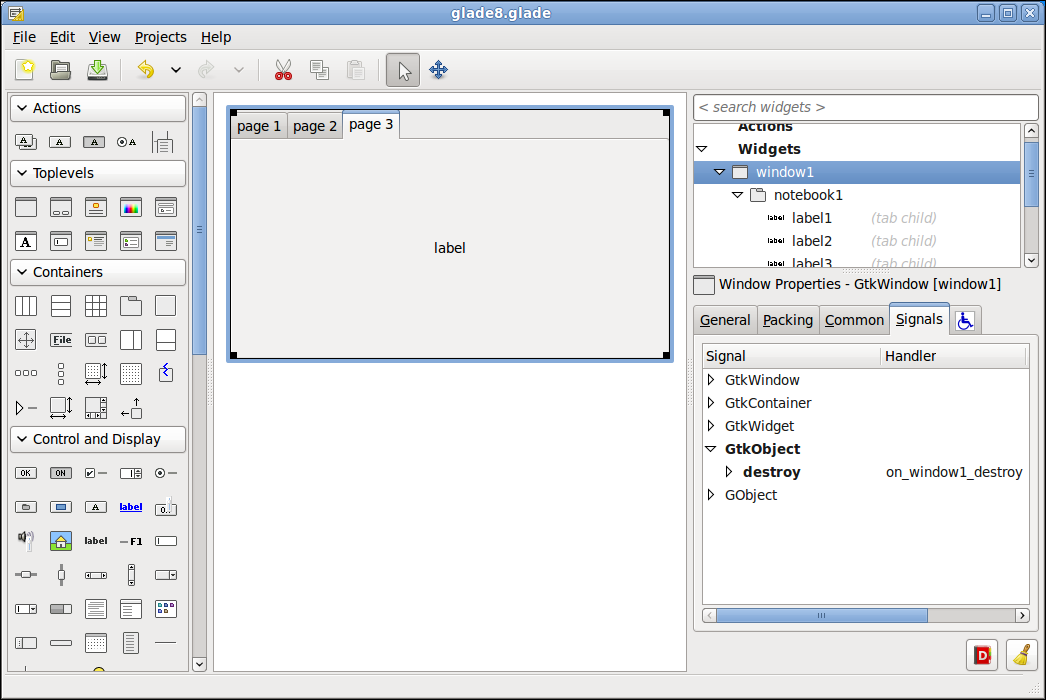
Start a new Glade project and add a Toplevel Window and a Notebook. Add a label to each page. Save the file as glade8.
Your project should look like this now.

-
Select window1 and on the Signals tab add the on_window1_destroy Handler to the GtkObject destroy Signal.
Your project should look like this now.

The Python Part
-
Start a new file and add the imports to the start of the file and save it as glade8.py.
#!/usr/bin/env python

try:
  import pygtk
  pygtk.require('2.0')
except:
  pass
try:
  import gtk
  import gtk.glade
except:
  print('GTK not available')
sys.exit(1)-
Next create the main class with the __init__ and on_window1_destroy methods then save the file. In this tutorial we show how to add a page to a notebook and how to set the position of that page.
class main:
  def __init__(self):
    self.builder = gtk.Builder() # create an instance of the gtk.Builder
    self.builder.add_from_file('glade8.glade') # add the xml file to the Builder
    self.builder.connect_signals(self) # connect the signals added in the glade file
    self.window = self.builder.get_object("window1") # This gets the 'window1' object

    # adding a tab to the notebook and inserting an object
    # get an instance of the notebook
    self.notebook = self.builder.get_object('notebook1')

    # we don't want the last page so we will use -1 as the index to remove it.
    # when you run the application notice that the label in page 3 was removed
    # along with the page.
    self.notebook.remove_page(-1)

    # create the objects for the page content and the tab label
    # the page object could be a container object in which other objects
    # could be added to after inserting into the notebook
    self.newtablabel = gtk.Label('new page') # create the tab label
    self.newpagelabel = gtk.Label('new page') # create the page label

    # insert a page into the notebook with page object, the tab label,
    # and the postion which starts at 0. We want this tab to be in the front
    # so we use position 0
    self.notebook.insert_page(self.newpagelabel, self.newtablabel, 0)

    self.window.show_all() # this shows all the objects
    self.notebook.set_current_page(0) # set the current page after showing

  # this signal was added to the glade file so we must have a method for
  # builder.connect.signals to connect to
  def on_window1_destroy(self, object, data=None):
    print "quit with cancel"
gtk.main_quit()-
Last bit of code that runs the application.
if __name__ == "__main__":
  main = main() # create an instance of our class
gtk.main() # run the darn thing-
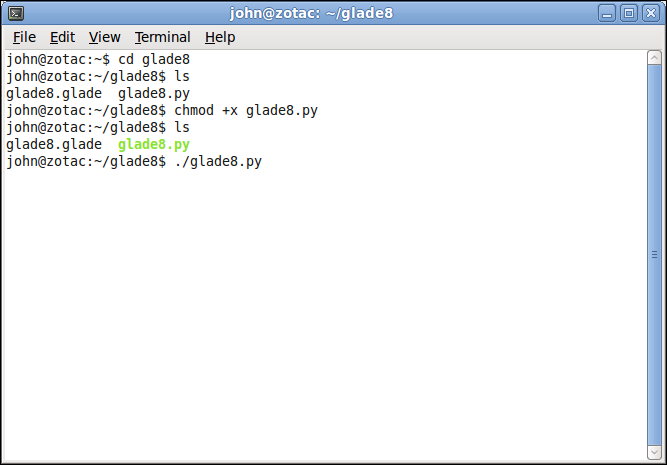
Save the file then open a terminal and change directories to your tutorial directory. Show the files with ls then change mode of the glade8.py to execute with chmod +x glade8.py. Now run ls again to confirm we have changed modes.
Your terminal should look like this now.

And your application should look like this.

Not much to look at but the technique of adding a tab and moving it around and deleting a tab is very powerful. Now you can dynamically move, add and remove tabs as needed in your program.
Next up is moving tabs around.