Creating a G code file
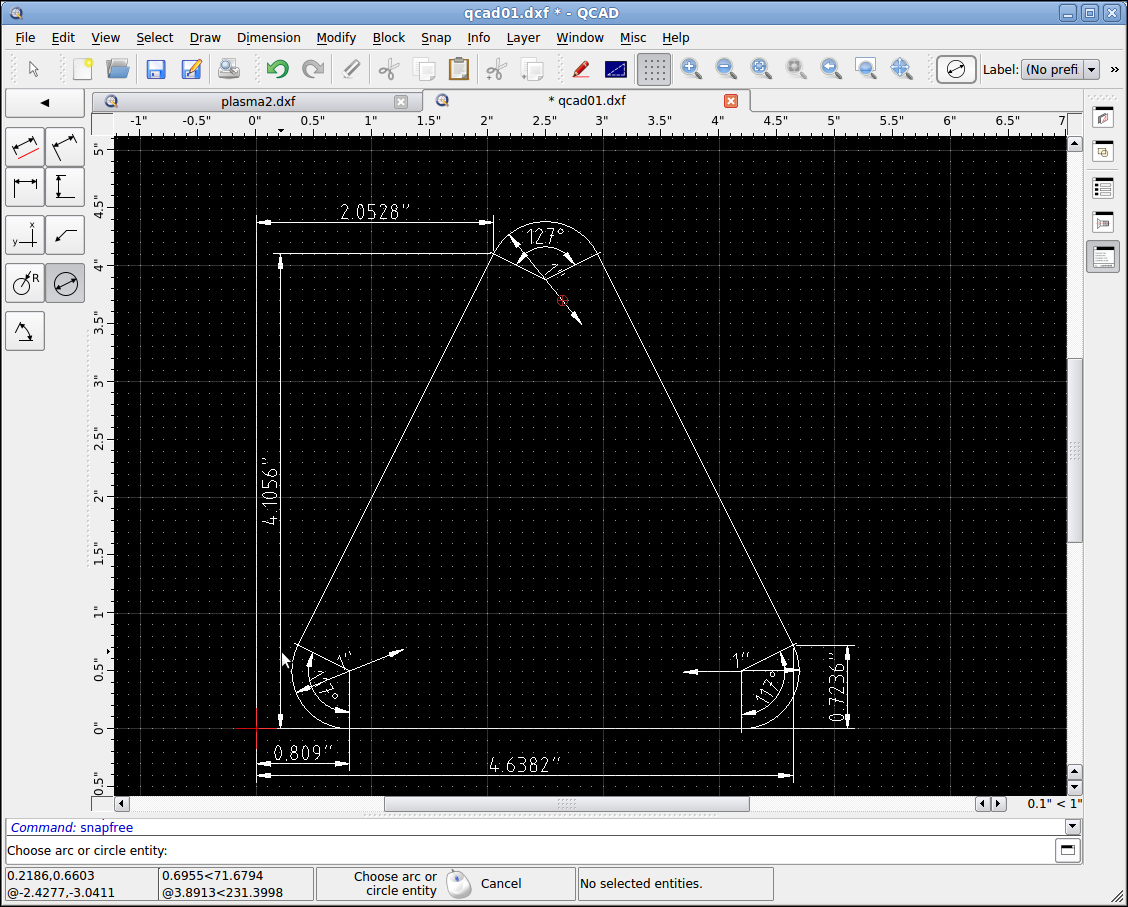
Open the drawing from the last QCad tutorial.

Start a new text document in Gedit and save it to your linuxcnc/nc_files folder.

The first thing we need to do is have a proper preamble to set the machine state. So for an inch mill put the following the first line.
G20 G17 G40 G49 G64 P0.005 G80 G90 G94
Next we want to move to a known location before starting our cut. We want to ramp down so we will move to X4 Y0
G0 X4 Y0
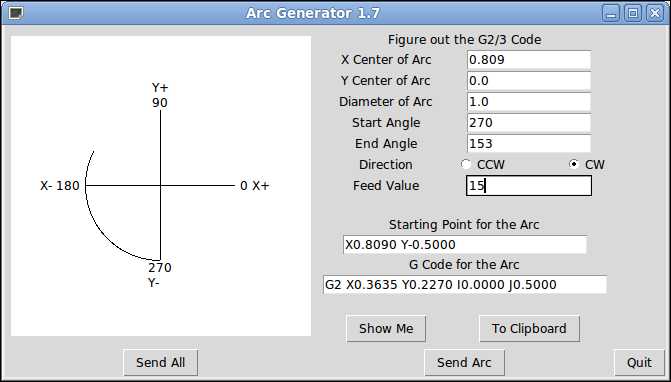
Open Arc Generator from the Tools > External Tools menu.
Looking at our drawing enter in the coordiantes of our first arc on the left bottom.

Press Show Me then Send All and your G code should look like this:
G20 G17 G40 G49 G64 P0.005 G80 G90 G94
G0 X4 Y0
F15
G1 X0.8090 Y-0.5000
G2 X0.3635 Y0.2270 I0.0000 J0.5000
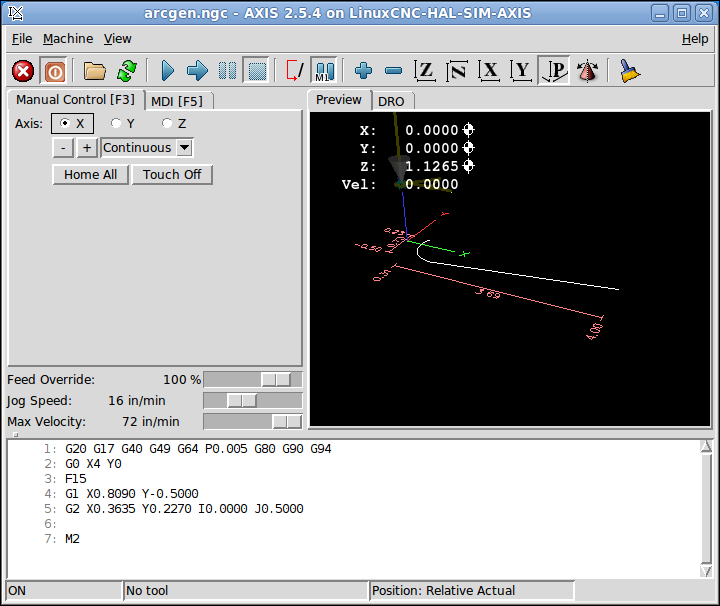
Skip a line and add a M2 to the end of the file and save it and the file should open in Axis without any errors.

You can see the entry line and the first arc. Now put the curser before the M2 and open up Arc Generator again and add the next arc.