Creating a Simple Panel
Simple Panel
-
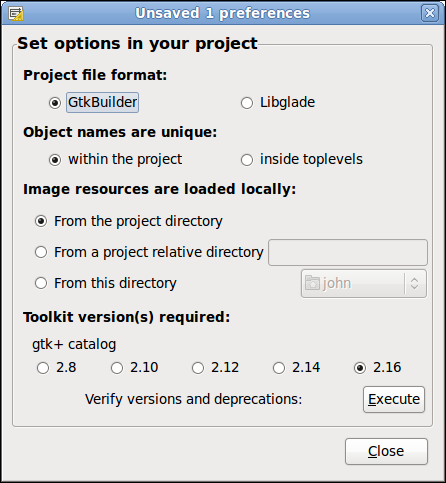
Open Glade Interface Designer from the Applications > Programming menu. The first thing you see is the Set options in your project and nothing needs to be changed so just click on Close.
-
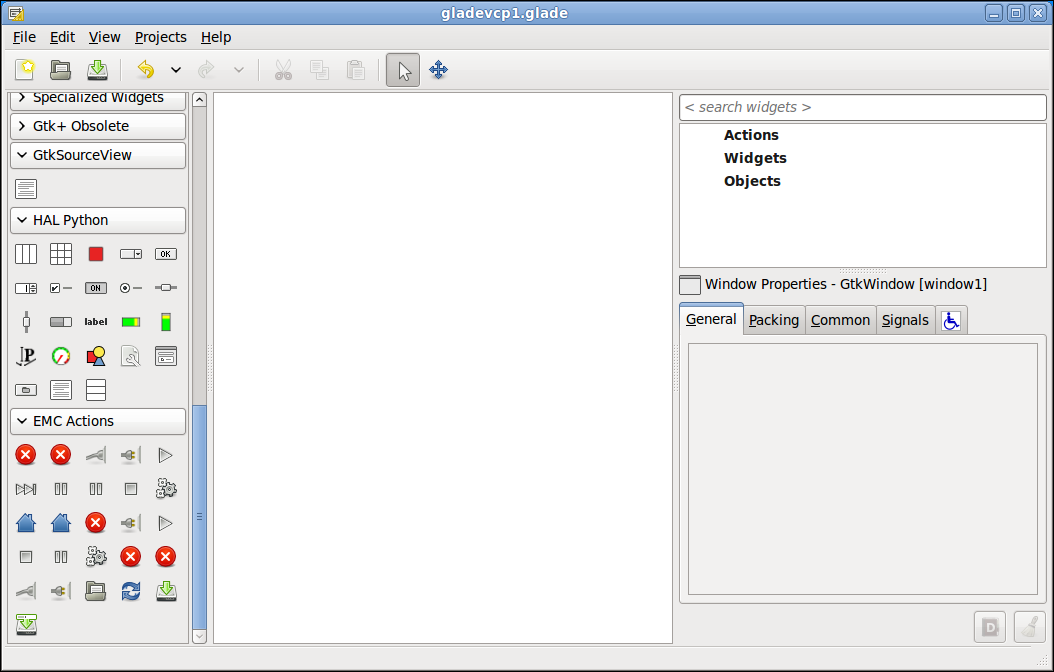
Next you have a blank project. On the left side of the Interface Designer is the palette which contains the widgets that can be used to build a user interface. Scroll down to make sure you see the HAL Python and EMC Actions groups. Create the directory gladevcp1 in the linuxcnc/configs directory and save your project as gladevcp1.
Your project should look like this now.
-
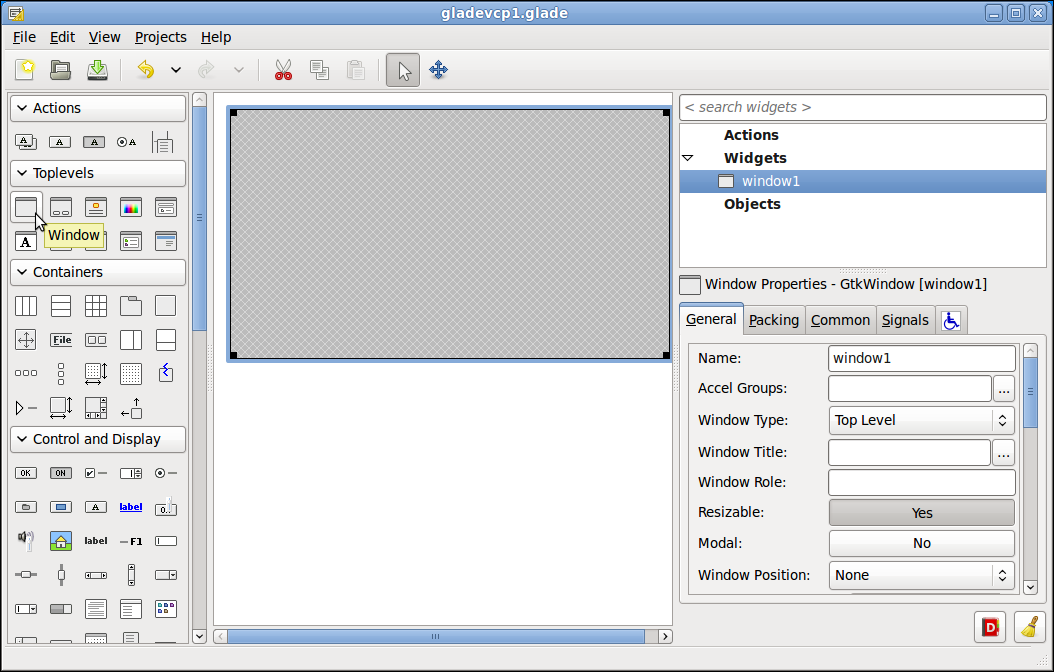
The first thing you need is a Toplevel Window so in the palette click on Window in the Toplevels group.
Your project should look like this now.
-
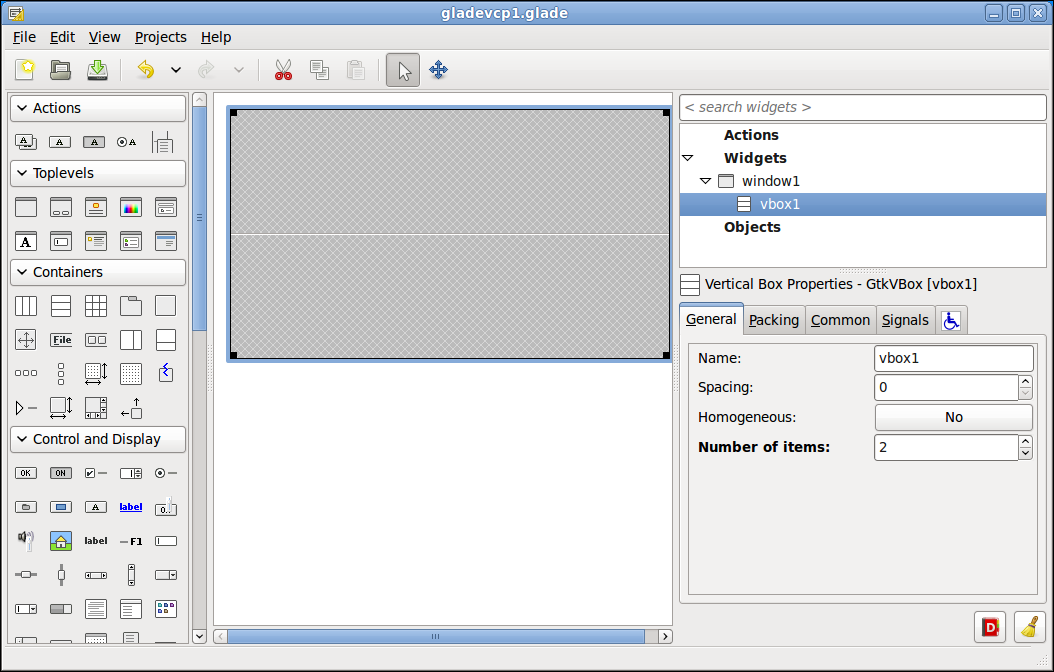
Next put a Vertical Container into the widow with 2 items.
Your project should look like this now.
-
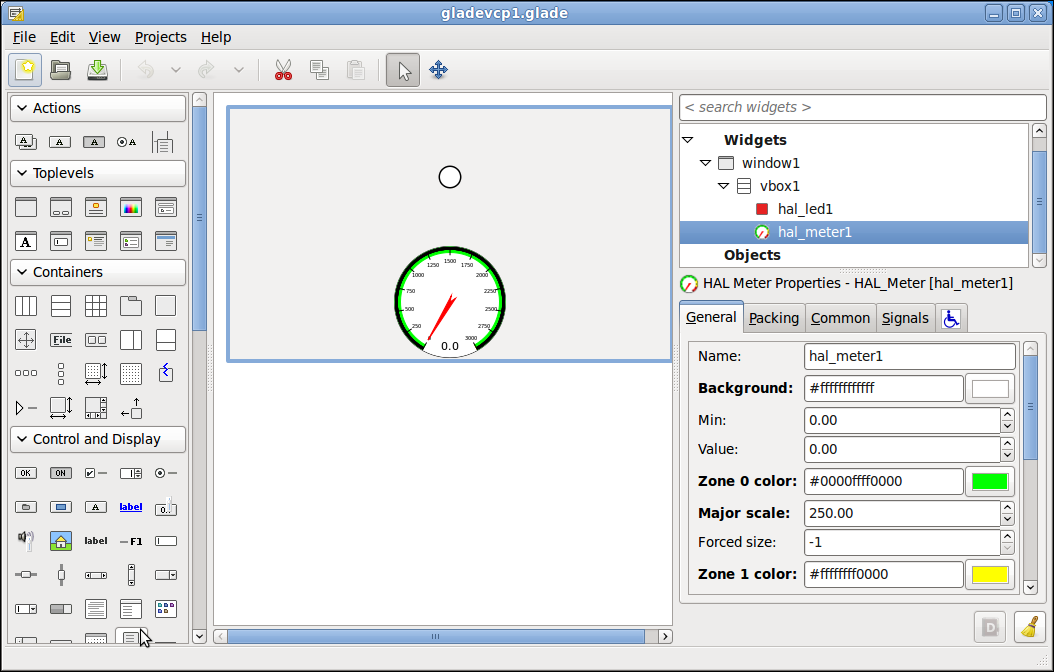
Next put a HAL Meter in the lower container and a HAL LED in the upper container.
-
I changed the HAL LED Pick off color: to Red: 255, Green: 255, Blue: 255 using the color picker box on the right side or you can just type in the color with #ffffffffffff.
-
I changed the Pick on color: to Red: 0, Green: 255, Blue: 0, to just type it in use #0000ffff0000
-
I changed the the hal_meter1 Major scale: to 250 and the Max: to 3000.
Your project should look like this now.
-
-
Now we need to test run our panel and in order to do that we need to add the following files to our linuxcnc/configs/gladevcp1 directory. Look in the gladevcp1.ini file in the [DISPLAY] section to see the ini entries I used to embed our panel into a tab in Axis.
-
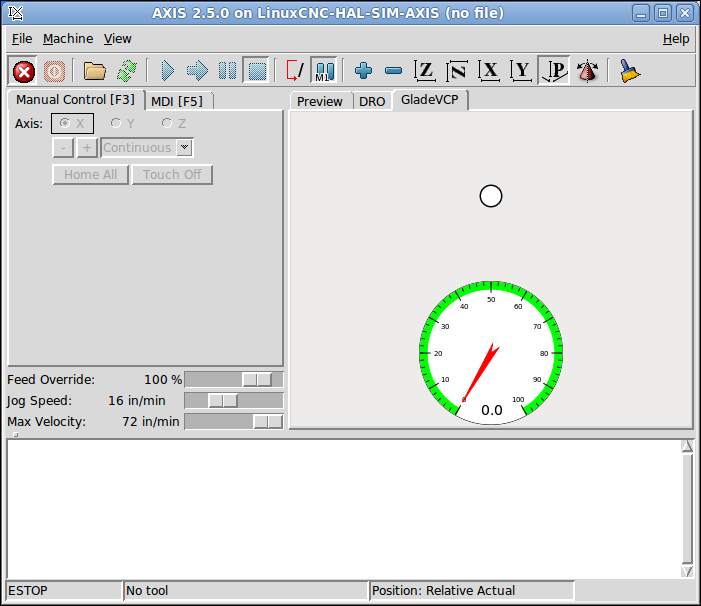
From the Applications > CNC menu run LinuxCNC and navigate to the gladevcp1 configuration and pick that one to run.
Your Axis GUI should look like this now.
Now that we have created and embedded our panel into Axis, next we will explore the python and HAL connections needed to make it actually do something.